
Step-by-step guide to configure a static IP on Windows 10 and 11 for the CALIFIA® Patient Module.
Configure Static IP for Windows 11
- Press the following key combos: Windows Key + Keyboard Key X
- Select Network Connections.
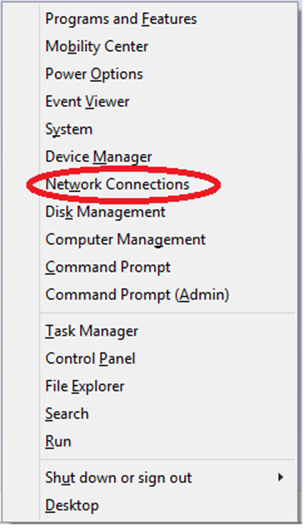 Figure 1. Windows X Menu.
 - Under Network & Internet select Ethernet.
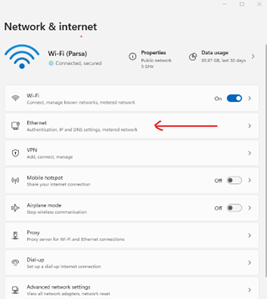 Figure 2. Network and internet menu.
 - Under the Ethernet, settings click the Edit button next to the IP assignment.
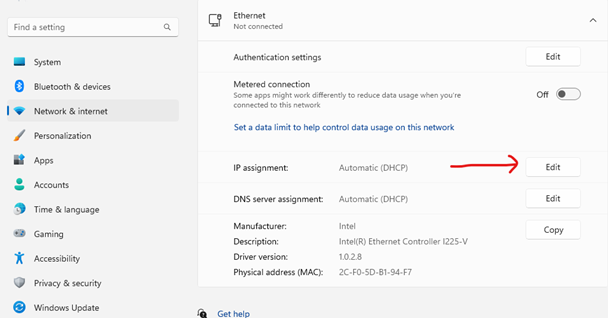 Figure 3. Ethernet menu.
 - Change the IP settings from Automatic (DHCP) to Manual. Then turn on the IPv4 option and fill in the IP address section as well as the Subnet mask as shown in the image below. Then press the Save button.
 Figure 4. IP settings for edition.
Configure Static IP for Windows 10
- Press the following key combos: Windows Key + Keyboard Key X
- Select Network Connections.
Figure 5. Windows X Menu. - Right-click on Ethernet (Local Area Connection) and click Properties.
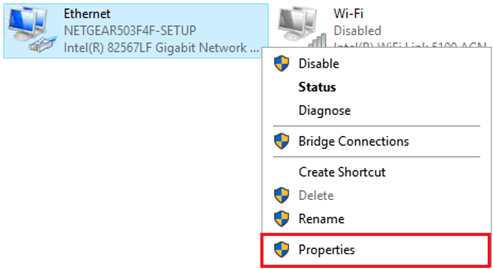 Figure 6. Accessing ethernet properties.
 - Internet Protocol Version 4 (TCP/IPv4) > and click Properties.
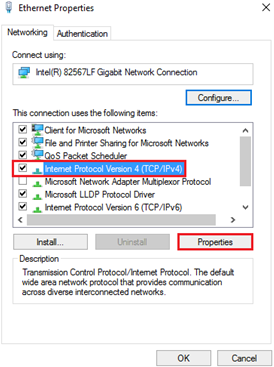 Figure 7. Accessing IPv4 properties.
 - Select Use the following IP address. Enter IP address 100.100.100.25 in the IP address field. Enter 255.0.0.0 in the subnet mask field. Click OK twice.
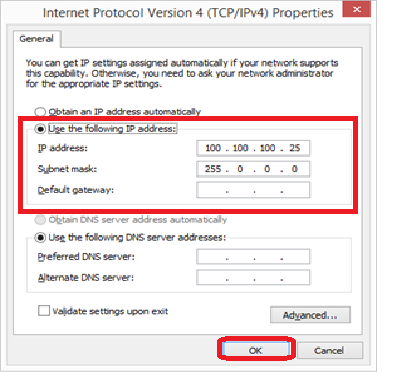 Figure 8. IPv4 properties menu.
 - Your Ethernet adapter is now configured with Static IP 100.100.100.25 and should be configured to Califia Patient Module.
If you still need further assistance, please contact a Biomed Simulation representative.